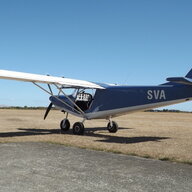
Hi Bryan, I have no detailed pics.
The J struts mount as you describe:
The upper bracket is riveted to the underside of the wing as shown Ch2 Pages 34 & 35.
The lower bracket is wrapped round the wingstrut and riveted under the trailing edge of that. In my manual this is shown Ch 26 Pages 6 & 7.
You do have to work out just where on the wingstrut:
I fastened the upper bracket, the position of this is clear from the manual.
I then had to trim the Jstrut to fit between wing and strut: I trimmed the top, cutting it off at an angle to match the wing underside. As I recall I did this initial trimming with a hacksaw, as it required a lot of material to be removed.
With this done I lodged the J strut top at the wing fastening and used a square on the strut while moving the Jstrut bottom, to establish where it should fall (as the Jstrut needs to be perpendicular to the wing strut).
With that position marked, I was able to wrap, drill and rivet the lower bracket to the wing strut.
And with the two brackets in place, I was then able to make final adjustments to the trimming of the Jstrut, and drill it for fastening.
For fastening I just used the rivnuts, with star washers as per the manual. I assume the thinking is that it requires very little force to hold the strut from bowing while it is in a straight condition. And that explains the light fastenings used.
Other notes:
As mentioned, a lot of the upper Jstrut had to be removed to make it fit.
The bottom of the Jstrut is already cut to a curve, but this does not match the shape of the Wingstrut very well. You may want to remove a little of the front of the curve.
With both brackets in place and while lodging the Jstrut for final fitting/drilling, I found I was at risk of pushing the wingstrut out of straight. To reduce the risk of this I worked the Jstrut shape to be a looser fit on the brackets, and also ran a stringline up the length of the Wingstrut.
The bottom bracket is SS, so not at risk of corrosion. However, since my struts are painted white, I ran white heatshrink onto it to neaten the appearance.
I hope this helps. It is a fitting job, rather than just straight assembly. But not difficult. It's just the manual..................(


